What Are Corner Clamps Used For?
You might have seen clamps of different kinds? But have you ever wondered What are corner clamps used for?
Corner clamps are used to hold objects at 90 degrees and 45 degrees while working on woodworking projects. These are also known as miter clamps due to the fact that they are commonly used for combining miter joints together.
However, there’s a lot more to learn when it comes to knowing What are corner clamps used for? Why should you invest in these angle clamps are how can they boost your efficiency.
Luckily, you have come to the right place because I am going to tell you everything you need to know.
What Are Corner Clamps Used For?
As mentioned earlier, an angle clamp can help you create 45 degrees and 90-degree angles on your woodworking projects. The reason why these corner clamps are used for joining miter joints is due to the fact that they help keep the workpieces at a perfect locking angle.
This allows you to create strong, lasting connections between two pieces of wood. Corner clamps can also be used as woodworking hold-down tools.
In other words, they can be used to keep your workpieces in place while you are working on them with a power tool such as a router or a saw.
The main reason why these clamps are so effective for this purpose is the fact that the clamp jaws have been designed to fit perfectly around the objects you want to secure.
Types of Corner Clamps
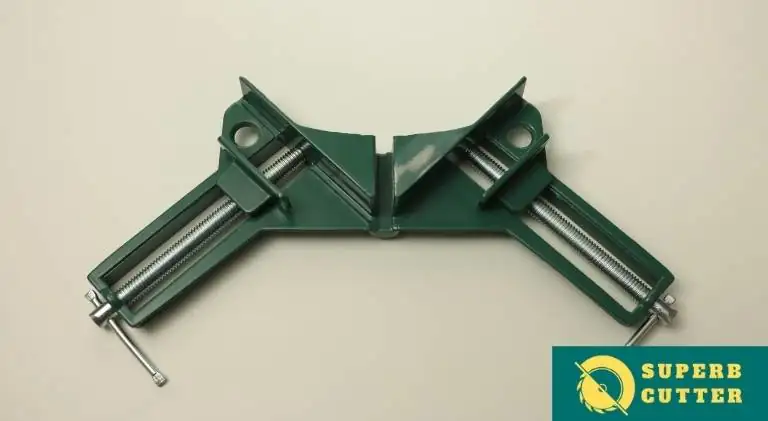
In order to fully understand the use of angle clamps, you need to know the different types of these woodworking clamps. This way you will be able to understand which type of clamp you need for your project and how it performs.
There are two main categories when it comes to miter clamps:
F-style Miter Clamps
This is the most common type of clamp. This design has jaws that are angled to 45 degrees (hence the name miter).
T-style Miter Clamps
These clamps feature two pieces, each with an angled jaw set to 45 degrees. T-style clamps can hold objects at 90 degrees and therefore cover a wider range than F-style clamps.
Quick Release Corner Clamps
In case you need to make a fast release, look for quick-release corner clamps. These are designed with built-in handles that allow you to quickly unlock the spring mechanism.
Single Screw Corner Clamps
These clamps are perfect for securing workpieces that have multiple irregular shapes. These types of miter clamps feature a single bolt that requires an Allen wrench in order to tighten the device. You simply move the bolt to adjust the angle at which you want to secure your workpieces.
Double Screw Corner Clamps
These are similar to corner clamps, but they have a much higher level of security. These devices feature two bolts instead of one and the jaws have been designed to provide maximum clamping.
Welding Corner Clamp
These types of clamps are designed to provide maximum holding power. They feature strong barbed jaws that grasp the object you are securing without slipping off the workpiece.
Parts of a Corner Clamp
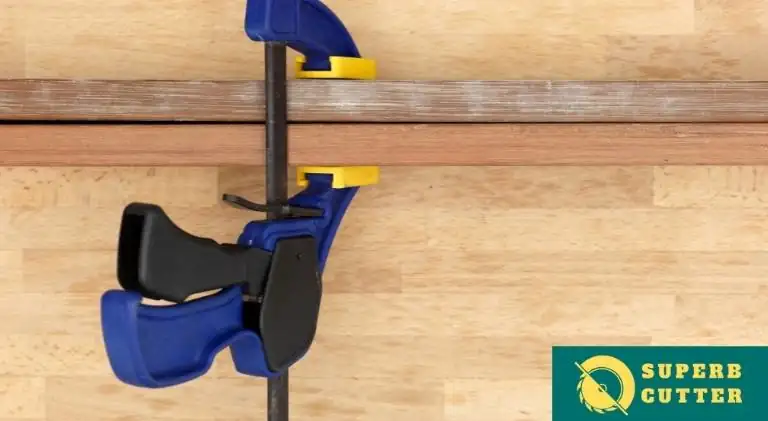
Now that you have a better understanding of the different types, let’s learn What are corner clamps used for? by going through their main components.
Jaws
The jaws of a clamp are designed to securely grip your workpiece at a 90-degree angle or a 45-degree angle. They also feature a series of teeth that allows them to hold the workpiece more securely.
Bolt Mechanism
The bolt mechanism helps you adjust the clamp’s jaw angle (45 degrees or 90-degree). It also comes with a large handwheel that allows you to turn it easily and lock down your adjustment in place so it won’t slip out of place when in use.
Spring Mechanism
This device helps you adjust the jaw angle by allowing it to open slightly and then quickly snapping shut when you let go of the hand wheel. This is how you achieve the right clamping force every time.
Guide Pins
These parts help you align your work before securing it in place with a corner clamp. It also allows for the adjustment of the jaw angle to 45 degrees.
Angle Clamps Size
When you are shopping for corner clamps, make sure that you consider their size. This is important because it will determine the capacity of each device. Here are your main options:
1/4-inch Corner Clamp
This type of clamp is perfect for smaller workpieces and projects.
3/8-inch Corner Clamp
This type of clamp is an excellent choice for securing medium-sized workpieces and projects. It has a greater holding strength than its 1/4-inch counterpart.
1/2-inch Corner Clamp
These clamps feature stronger jaws and a higher clamping capacity than their smaller counterparts. They can hold larger workpieces and projects with ease.
3/4-inch Corner Clamp
This type of miter clamp is perfect for securing larger workpieces and projects that require high-quality clamps that won’t let go under pressure.
1-inch Corner Clamp
These large corner clamps have the highest holding strength and are perfect for securing heavy-duty workpieces.
Corner Clamp Placement
You can place a miter clamp on any edge of your workpiece that has a 90-degree angle or 45-degree angle (if you’re using F-style clamps). A corner clamp is only designed to secure an edge. It cannot be used on the entire length of a workpiece.
Using Corner Clamps The Right Way
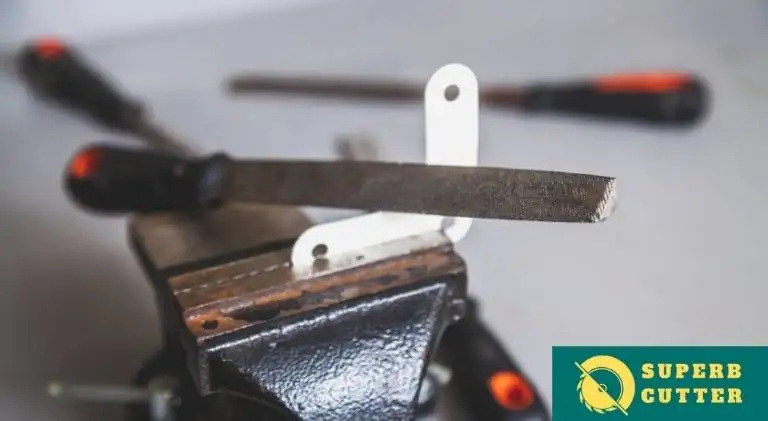
Now that you know all about the different types of corner clamps available and what their components are, let’s learn how to use them properly. Here are some simple steps you can follow:
Step 1: Place one jaw on the edge of your workpiece that has a 90-degree angle or 45-degree angle (when using F-style clamps). Make sure to align it properly.
Step 2: Secure the base plate of your clamp to the edge of your workpiece with screws for added security.
Step 3: Adjust the jaw angle of the clamp to either 45 degrees or 90 degrees (when using F-style clamps). To do this, rotate the large hand wheel until you feel it click into place.
Step 4: Secure your workpiece by squeezing it down on the handle until it snaps shut. You can use an extension if necessary to reach difficult corners.
Step 5: Secure your workpiece by rotating the large hand wheel until it locks into place.
How Can Corner Clamps Boost Your Efficiency?
Corner clamps are good to have.
This means you’ll be able to finish your project in half the time while also producing high-quality results. You can also use corner clamps to help you with edge-banding jobs.
If you’re planning on finishing the sides of your workpiece or covering them with a different type of material, this is the best tool to use. You can also use it when routing edges or cleaning up a lot of dust during a project.
What Kind Of Joinery Can You Do With A Corner Clamp?
When you are using a corner clamp, you can do the following joinery jobs:
Glue Joints
With this type of joint, both sides are glued to one another. You’ll need to use clamps or weights to hold them in place while they dry. There are two types of glue joints that you can choose from:
Miter Joints
This type of joinery involves two pieces that meet at a 45-degree angle. You’ll need to cut this product carefully before you apply glue because one side is already finished.
Butt Joints
Butt joints are simply glued products that meet flush together with no angled cuts or other features.
T-joints
This type of joinery is perfect for both woodworking and metalworking. In fact, it can even be used as a fastener for roofing materials. It’s also one of the simplest types of joinery to make.
Other Corner Joinery Jobs You Can Do With Corner Clamps
In addition to making glue joints and performing butt and miter joinery, you can use a clamp to do the following jobs:
Metalworking Joints
There are many different types of metalworking joints that you can make with corner clamps. Here is just a small sample of them:
Box Joints
This type of joint requires two separate pieces and results in a square cut. You can use a table saw or a miter saw to create this type of joinery. It’s handmade and closely resembles dovetails on a smaller scale.
Tee Joints
The simplest way to make this joint is with two separate pieces of material that you’ll hold together with corner clamps while they dry. You’ll need to cut one side of the material before gluing it together with the other piece.
Mortise & Tenon Joints
If you’re creating this type of joinery, you’ll first need to create both mortises and tenons on your two separate pieces of material. Then you can clamp them together while they dry.
Dovetail Joints
This type of joinery is more complex than the other types. You’ll need to cut both tails and pins before you hold them together with a clamp. You can use a dovetail jig for this or just hand-cut your pieces.
Can You Work Without Miter Clamps?
As you can see, corner clamps are vital to many different types of joinery jobs. You also don’t necessarily need miter clamps in order to create all of these different joints with your table saw or miter saw.
It’s simply an easier way to get the job done effectively so you produce good results. But if you don’t have a lot of experience with making these types of joints, you may want to use a miter clamp.
Will Corner Clamps Damage My Work Piece?
When used properly, corner clamps won’t damage your material as long as you follow the instructions from the manufacturer. These instructions should tell you how much pressure to apply and for how long to hold your product in place.
If you find that the clamp is squeezing too hard or for too long, you should take it off so your material doesn’t get crushed. But if you don’t think it’s applying enough pressure, apply more yourself to get the job done properly.
When Should You Use Miter Clamps?
When you’re just learning how to perform corner joinery jobs, it’s usually best to use miter clamps. This will allow you to work more precisely and make less mistakes as you learn what angles you should be using on your materials.
As you improve your skills with making these joints, you can start working without them and see if you can make the same quality of cut.
Can You Use Corner Clamps to Cut Joints?
Although most people use corner clamps for gluing material together, you can also use them as a cutting guide for your table saw or miter saw.
After marking where on your work piece that you want the corner of the clamp to be, cut along the guide so you get a straight line. Doing this can help to ensure that your joint will fit properly when you glue it together.
Final Thoughts
You can use corner clamps in your woodworking and metalworking projects to create different types of joints. And in most cases, you can do this more quickly and efficiently with a clamp rather than without one.
But if you’re just learning how to perform these jobs, it’s usually best to work with miter clamps until you become better at making the joints.
I hope it will be clear now and you will have learned the right use of corner clamps. Besides that, you should also have an idea about different types of clamps and various projects where they can help you.
So next time when you are about to work on a picture framing project be sure to have corner clamps in your inventory.
If you have enjoyed reading this article, please share it with your friends and family.


![What Size Nails For Baseboard Trim - [Read This First] 6 What Size Nails For Baseboard Trim – [Read This First]](https://www.superbcutter.com/wp-content/uploads/2022/01/What-Size-Nails-for-Baseboard-Trim-1.webp)
